
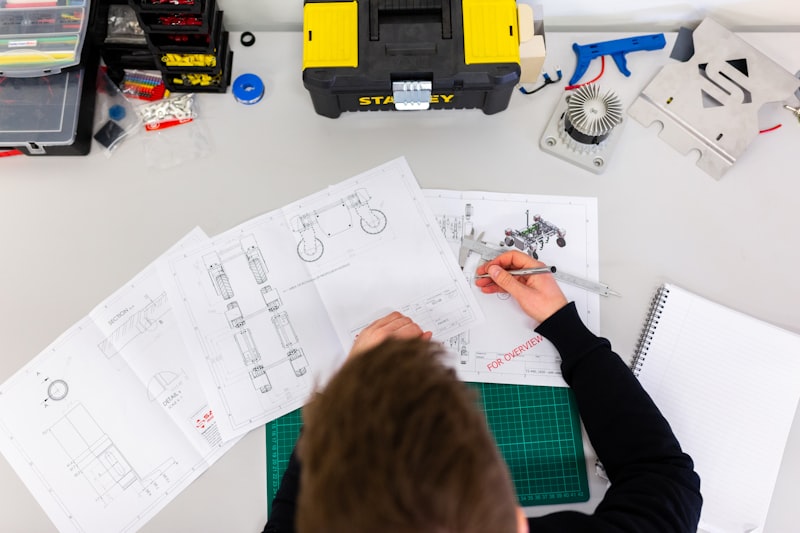
After wiring and commissioning thousands of control cabinets across water treatment plants, manufacturing lines, and power infrastructure, one truth remains constant: poor wiring is the root cause of more downtime than any PLC failure. IEC 60204-1 isn't just a compliance checkbox — it's the accumulated wisdom of decades of electrical safety engineering. This guide covers the wiring standards that actually matter in practice, from grounding philosophy to cable duct fill ratios.
1. Why Wiring Standards Matter
Every control panel we build at SENTRADO follows IEC 60204-1 (Safety of machinery — Electrical equipment of machines), the international standard governing electrical equipment in industrial machinery. But compliance alone isn't the goal. Proper wiring standards deliver three critical outcomes:
- Personnel safety: Proper grounding, overcurrent protection, and clear separation of hazardous voltages prevent electric shock and arc flash incidents. IEC 60204-1 requires that all exposed conductive parts be connected to the protective bonding circuit with impedance not exceeding 0.1 Ω.
- Electromagnetic compatibility (EMC): A VFD's PWM output generates rapid voltage transitions (dV/dt up to 10 kV/μs) that radiate EMI. Without proper shield termination and cable segregation, these emissions corrupt analog signals, cause encoder counting errors, and even crash communication buses. We've seen a 4-20 mA level transmitter read 30% error because its cable ran parallel to a VFD motor cable in the same duct.
- Maintainability: A well-wired panel with consistent labeling, color coding, and service loops allows a technician to troubleshoot in minutes rather than hours. When a production line is losing $5,000 per hour of downtime, traceability isn't a luxury — it's a financial imperative.
2. IEC 60204-1 Core Requirements
IEC 60204-1 establishes mandatory requirements for electrical equipment on machines. Here are the sections that directly impact control cabinet wiring:
Protective Bonding and Grounding
The standard requires a protective bonding circuit connecting all exposed conductive parts. In practice, this means a copper PE busbar (minimum cross-section determined by the largest incoming conductor) with dedicated grounding terminals for every component. The PE conductor must be green/yellow and never interrupted by a switch or fuse. For cabinets with incoming supply above 100A, we specify a 20×3 mm tinned copper busbar with at least two connection points to the plant grounding system.
Conductor Cross-Section Sizing
Minimum conductor sizes per IEC 60204-1 Table 5: 0.75 mm² for flexible copper conductors in control circuits, and 1.0 mm² for internal wiring to equipment terminals. However, we never use less than 1.0 mm² for signal wiring and 1.5 mm² for power wiring. The voltage drop at maximum operating current must not exceed 5% of nominal voltage for power circuits and 3% for control circuits.
Color Coding
IEC 60204-1 specifies conductor identification colors:
| Circuit Type | Color | Notes |
|---|---|---|
| Protective earth (PE) | Green/Yellow | Mandatory, never used for any other purpose |
| AC power (L1/L2/L3) | Black / Black / Black with numbers | Phase identification by ferrule numbers |
| Neutral (N) | Light Blue | Must not be green/yellow |
| DC control (+24V) | Red | Our standard |
| DC control (0V) | Blue | Our standard |
| AC control circuits | Black or Red | Must differ from PE |
3. Why Must Power and Signal Wiring Be Separated?
The principle is simple: keep cables that generate electromagnetic interference away from cables susceptible to it. IEC 61000-5-2 provides guidance on cable routing for EMC, but here are our practical rules:
- Minimum separation distance: Maintain at least 200 mm between power cables (AC 230V/400V) and signal cables (24V DC, analog, communication). When they must cross, do so at 90 degrees — never run parallel.
- Metal partitions: In large cabinets, use grounded galvanized steel partition plates between the power compartment (breakers, contactors, VFDs) and the control compartment (PLC, I/O modules, terminal blocks). The partition must make 360° contact with the mounting plate at multiple points.
- Separate cable ducts: Use three distinct wiring channels: one for motor/power cables, one for AC control, and one for DC signals and communication. We typically use 80×60 mm duct for power and 60×40 mm for signals in a standard 800×600 cabinet.
- VFD motor cables: These are the highest EMI source. Use shielded VFD cable (e.g., Ölflex Servo or Lapp Unitronic) with the shield grounded at both the drive end and motor end. Route motor cables at least 300 mm from any signal cable.
💡 SENTRADO Engineering Tip
When cabinet space makes 200mm separation impossible, use shielded cable for the signal circuit AND route it in a grounded metal cable duct. The metal duct provides additional attenuation of 20-30 dB across most of the frequency spectrum. We've saved many compact panels this way.
4. How Should You Ground Shielded Cables in a Control Cabinet?
Shield grounding is where more than half of EMC issues originate. The shield must be terminated with a 360° circumference connection — a pigtail wire dramatically reduces shielding effectiveness, especially at high frequencies. At 10 MHz, a 50mm pigtail has roughly 15 Ω of inductive reactance, making the shield nearly useless.
Single-End vs Double-End Shield Grounding
- Single-end grounding (one side only): Use for low-frequency analog signals (4-20mA, thermocouples, RTDs) where ground loop currents would cause measurement errors. Ground at the cabinet (PLC) end only, leaving the field end unterminated. This prevents 50/60 Hz hum from ground potential differences.
- Double-end grounding (both sides): Use for high-frequency signals (PROFINET, encoder cables, VFD motor cables) and where EMC immunity is critical. The shield must make solid, low-inductance contact at both ends. If ground potential difference exceeds 1V, install an equipotential bonding conductor (minimum 16 mm²) parallel to the cable to divert circulating currents.
At SENTRADO, we use Phoenix Contact SK 14 or equivalent shield connection clamps that provide 360° contact directly to a grounded mounting rail. We never use a simple wire pigtail for shield termination — the inductance defeats the purpose.
5. Terminal Block Layout Strategies
Terminal blocks are the interface between the cabinet and the field world. A logical layout saves hours during commissioning and maintenance:
- Zoned arrangement: Group terminals by function — field digital inputs in Zone A, field analog inputs in Zone B, outputs to motors/valves in Zone C, communication in Zone D. This matches the I/O module arrangement above and makes cross-referencing intuitive.
- 20% spare capacity: Every terminal block row must include at least 20% spare terminals for future expansion. If a cabinet has 64 active field I/O points, we install 77+ terminal points. This is a SENTRADO standard that pays dividends when clients want to add instruments later.
- Wire ferrules and numbering: Every conductor must be crimped with a properly sized bootlace ferrule (no bare wire in terminals). Each wire carries a printed heat-shrink ferrule at both ends with a unique wire number matching the electrical schematic. We use a hierarchical numbering scheme: page number-row-terminal (e.g., 05-X3:12).
- Terminal types: Use screw-clamp or spring-cage terminals for general I/O. For thermocouples, use dedicated thermocouple terminal blocks made of the same metal as the thermocouple to avoid cold junction errors. For Ex i circuits, use blue-colored Ex-rated terminals with at least 50mm separation from non-intrinsically-safe circuits.
6. DIN Rail Component Placement
Component placement on the mounting plate follows thermal and functional logic:
- Heavy components at the bottom: Transformers, power supplies, and VFDs generate the most heat and are heaviest. Mount them on the lower DIN rails where their weight is supported and their heat rises away from sensitive electronics above.
- Heat-sensitive components at the top: PLC CPUs, communication modules, and HMI panels go in the upper section where ambient temperature is lowest. The temperature difference between bottom and top of a sealed cabinet can be 10-15°C.
- Thermal clearance: Maintain at least 50mm clearance above and below VFDs and power supplies for convective cooling. Check manufacturer data sheets — some VFDs require 100mm above and below when mounted side by side.
- Service access: Every component must be reachable without removing another component. DIN rails should be positioned so that terminal screws are accessible with a standard screwdriver at a 30° angle.
7. How Full Should Cable Ducts Be? The 60% Rule Explained
The IEC 60204-1 / IEC 60364-5-52 guidance on cable duct fill is clear: conduits and trunking should not be filled beyond 40% of their cross-sectional area to allow for heat dissipation and future additions. Our internal standard is even more conservative at 60% maximum fill ratio for cable ducts with lids:
Fill ratio calculation: If a duct has a usable internal area of 4,800 mm² (80×60mm) and each cable has an outer cross-section of 20 mm², maximum cables = 4,800 × 0.60 / 20 = 144 cables. We also account for conductor diameter — power cables (2.5mm²) take significantly more space than signal wires (0.75mm²).
8. EMC Compliance Techniques
Beyond cable segregation and shield grounding, several additional techniques ensure EMC compliance:
- EMC filters at cabinet entry: Install mains filters (e.g., Schaffner FN series) as close as possible to the cabinet's power input point, ideally within 200mm of the main breaker. The filter must be mounted on a bare metal (unpainted) surface for low-impedance chassis connection.
- Grounding busbar: A central PE/ground busbar provides a single reference point. All cabinet components, DIN rails, mounting plates, cable shields, and the enclosure itself connect to this busbar. The busbar then bonds to the plant grounding electrode system via a minimum 16 mm² conductor.
- Equipotential bonding: For distributed systems with cabinets connected by shielded cables, ensure all cabinets share a common ground reference. Use copper bonding straps (minimum 6 mm², braided for flexibility) between enclosure doors and the main body — paint under the hinge is an insulator.
- Surge protection (SPD): Install Type 2 SPDs on the incoming power supply for outdoor installations. For signal circuits exposed to lightning (field cables running between buildings), add Type 3 SPDs at both ends.
9. Labeling and Documentation Requirements
Every SENTRADO cabinet ships with a complete documentation package that complies with IEC 60204-1 Clause 18:
- Main nameplate with manufacturer, model, serial number, supply voltage, frequency, and full-load current
- Internal component labels matching the schematic reference designators (K1, Q2, X3, etc.)
- Warning labels for arc flash, residual voltage, and hazardous voltage as required
- As-built electrical schematics (PDF + DWG), terminal block diagrams, and Bill of Materials
- PLC program backup with version documentation
- Functional test report with insulation resistance, continuity, and dielectric test results
10. What Wiring Mistakes Cause the Most Commissioning Problems?
In our quality audits, these are the wiring defects we catch most frequently in panels built by other manufacturers:
- Pigtail shield termination: The #1 EMC mistake. A 100mm wire tail from shield to ground adds approximately 30 Ω of inductive reactance at 100 MHz, rendering the shield ineffective. Always use 360° shield clamps.
- Mixing AC and DC in the same duct: Running 230V AC valve control wires alongside 24V DC analog signals causes induced noise. Even a few centimeters of parallel run can couple several volts of 50Hz interference into a 4-20mA loop.
- Insufficient service loops: Wires pulled tight with no slack break free when the cabinet door opens or components vibrate. Leave 50-80mm of service loop at every terminal connection.
- Over-tightened terminals: Screw terminals have specified torque values (typically 0.5-0.8 Nm for 2.5mm² conductors). Over-tightening strips threads and damages ferrules. We use calibrated torque screwdrivers on every terminal.
- Missing ferrules: Stranded wire inserted directly into spring or screw terminals eventually loosens due to cold flow. Every stranded conductor gets a properly crimped bootlace ferrule.
11. SENTRADO's Wiring Quality Process
Every PLC control cabinet we manufacture passes through a multi-point inspection process before shipping:
- Visual inspection: 100% of wiring checked for routing, labeling, ferrules, and workmanship against IPC/WHMA-A-620 Class 2 standards
- Continuity test: Every wire tested end-to-end against the schematic using a cable tester
- Insulation resistance: 1000V megger test between all circuits and PE (minimum 10 MΩ)
- Dielectric withstand: 1500V AC applied for 60 seconds between power circuits and ground (per IEC 60204-1 Clause 18.4)
- Protective bonding continuity: Maximum 0.1 Ω verified with 10A test current
- Functional test: Full I/O simulation with all field devices connected where possible
We document every test result and include the signed test report in the delivery package. This process has helped us achieve less than 0.5% field defect rate across thousands of deployed panels.
Need a Standards-Compliant PLC Cabinet?
Our engineering team designs and builds IEC 60204-1 compliant control cabinets with full documentation and certified testing. Get a quote within 48 hours.
Related Articles
PLC Control Cabinet Design for Harsh Environments
IP ratings, thermal management, and EMI shielding for extreme conditions.
PLC SystemsHow to Choose the Right PLC Control Cabinet
Key considerations for I/O requirements, environmental conditions, and PLC selection.
PLC SystemsComplete PLC Control Cabinet Components List
A detailed BOM guide covering every component inside a modern PLC cabinet.